*Yes, I bought the mattress at the Goodwill store ($30), cut it down to size and it worked out great.
Answering Dave's Questions, May 4, 2015
Welcome to the site, Dave. It's gotten over 260,000 hits since I put it together six years ago. I know it lacks
specifics but I haven't had time to add a lot of dimensions,
drawings, more photos or so forth. I think its pretty good the way it is.
I'm going to add an introductory video one of these days.
Congratulations on getting through nursing school. I squeaked through law school many decades ago. Twenty years later, I left lawyering to become an art teacher. Best thing I ever did.
There are too many lawyers and I did my part to correct that problem.
THE BASICS OF BUILDING A CAMPER...
The Quick Version
You start converting your van tossing out the back seats. Then, you measure the area you have to work with
(things like, "How far do I want the driver's seat to slide back or recline?" become
important...) Then, it's how big to I want the bed to be? (Ours is a
little narrower than a full ("double") bed) Make it an inch longer than the tallest person sleeping in it. Then, you build the
shelves and stuff around that.
Now build it!
Improvised changing room, Cataloochee Campground, Smokey Mountain National Park, a very special place. Making this "room" is a rare thing for us (it's the only time I've tried it). I guess I was changing out of wet clothes after being caught in the rain.
WHAT WOULD YOU DO DIFFERENTLY?
Its odd but there is very
little I would do differently if I were building the camper now. I would make the two struts that hold up
the couch back stronger (thicker/stronger wood or maybe metal) because
they cracked a bit and had to be repaired en route (no big deal).
We're
just happy with our set up. It's simple. I even made a tiny fold-up toilet which also can be a stool or garbage can.
Your planned route for the summer sounds
great. Did you see the one we took? If not , look at the blog entries
from the summer of 2011 (beginning at the end of June, 2014. It is similar to the one you are planning). It starts right after the conversion piece.
(Response to a question on 5-18-14)
Hi Jordan,
Great to hear you're going to be having some fun in your soon-to-be-built Sienna camper (it's the same year as ours).
Look at that third seat carefully. Fat, tight, bolts hold it to the frame. Remove them with socket wrenches
and
the whole seat lifts out. I think we put the bolts back in to fill
the remaining holes. In many cases we used the bolts like this, slightly sticking out, to hold or fasten things.
I don't think I mention it in the blog but I also removed the flip-up mini-table between the two front seats. This gives you much more room to pass to the back. We don't miss it at all. Some wedge little ice chests into the remaining spot for "easily accessible snacks".
Some of these have 12-volt refrigeration systems. Our "refrigerator"
(an ice box right behind the driver's seat) works fine for us. Your friends to the south,
Glenn and Francesca
_________________
THE RONSMANS ON THE ROAD
JULY 1, 2014 We heard from the Dave and Meg Ronsman, a couple currently touring the west in their converted Honda minivan. Here's a note from them plus info on their blog and a short, descriptive video (go to the end, the first entry on their blog, "June, 2014") for the "how we did it" part.
Thanks Glenn,
Our van is complete. We made a few changes and additions as you can see on our blog:
http://ronsman.blogspot.com/ Without your pictures and a
place for people to post similar experiences it would not have come to
be.
We now have
screens cut to fit outside the windows that we attach with
magnets. Curtains are coming soon. We put a plug-in cooler in the "trunk" which helps to limit the
necessity of buying ice.
We love our foldable table idea, a nice luxury. All in all we are very happy with how we built our camper based on your general model.
With
that being said, Meg and I are on the road. We've enjoyed the luxury
that the van brings- like sleeping in downtown Aspen, CO undercover on a
travel day after backpacking the mountains.
There is great joy in simple living.
Enjoying the journey,
Dave and Meg
July 10, 2014
I read that the Ronsmans (above) had begun their journey by driving from Wisconsin to San Francisco. My wife and I are visiting the Bay Area too so we invited them to come see us in Berkeley.
 It was so exciting to see them drive up in the '06 Odyssey, tricked out much like the one I built in this blog. They've done a few things differently, like putting a plug-in cooler in "the basement".
 Dave is a happy camper
 They're a wonderful couple and we gave them the Berkeley tour.
  Here we are in hills looking towards the San Francisco bay and the Golden gate bridge.
Francesca and Meg chillin' in the mini-camper.
This is the first time that I've seen the results of my minivan conversion blog in person. It was a thrill. We wish Meg and Dave many more miles of smiles on the road.
___________
EXTRA ELECTRIC
August 9, 2014 A new friend, "Ninh", wrote today. She's about to go camping in her Sienna and asked about AC converters and lights.
Hi Ninh,
Good to hear from you. We just got back from a three-day 1000 mile trip in the van. It worked perfectly, even at 120,000 miles!
We sometimes use an $20 AC converter (Radio Shack) that plugs into the dash or the rear plug hole. We use it for the computer, to re-charge the phone and camera, and other simple tasks.
How much light do you need? For lights
at night we use the van lights (there are many), electric lanterns, flashlights, and the
little headband lights. We have a propane lantern but don't take it
with us much. It is good for creating a lot of light, at group gatherings and such.
Some people install a second battery in their vans to run lights, accessories and to not have to worry about running down the main engine battery. Using too much of the main battery's power has never been a problem for us though.
Most
campgrounds have electricity so we keep an extension cord, small clamping desk light, an electric heater and fan in "the basement" boxes.
Also, consider living without electricity for short times. Use candles or see what its like to explore "the dark". The un-illuminated night an be an exciting place.
I hope this helps. Let me know if you need any other assistance.
Glenn
October 21, 2014
DROZENS BACK FROM THEIR 2000 MILE ADVENTURE
Ninh Drozen wrote to me last summer for a few tips on his Sienna conversion and I was happy to comply (see above).
Last month he and his wife completed their first adventure, a long awaited trip from the Bay Area to Seattle in their camper.
Here are his thoughts about his project.
We
just came back after almost 2000 miles from the Bay Area to Seattle.
The bed and shelves served us well. We learned a lot more after the
trip and some modifications are
coming:
1. I'm going to reduce the bed length from 72" to 67" to gain some space behind the front seats (I am only 5'7", it's all we need))
2. Cut the width of the bed by 6" to build more shelves. We found the shelves were so useful that we will build more.
3. Add an AC inverter to cook
rice or hot water while we were driving.
4. Buy camping cookwares to save spaces as the handles from our home pots and pans are so awkward and take too much room.
Also, the little table was great to have a a cozy meal while it rained outside. There was a lot of rain on our trip.
Ninh
_________________________________________________
My wife and I just spent the weekend in the Florida Keys in our converted Sienna. See:
" www.thegroveguy.blogspot.com " (10-20-14 entry)
for pictures and commentary. Glenn
___________
2-19-15 Last month we took the van to North Florida to explore our state's "Forgotten Coast". We swam with manatees and camped on a windswept island. You can read about it in my January/February '15 blogs.
Terri M. , from Sebastian, Fla., wrote today about converting her '09 Sienna. Here's my reply:
Hi Terri,
Thanks for thinking of my van conversion as "awesome". My wife and I
have certainly had some great times using it these last four years.
I really don't have "specs" on my van. I started out by getting rid
of the back seats then carefully measuring what spaces I had to work
with, then worked from there. We tried to make it like a VW van, only
better in many ways. Sure, the top doesn't pop up to add another crummy bed and rarely used standing space, but that 's okay. The gas fridge kept breaking down, etc. With the Toyota you get much more comfort, more safety, and best of all, reliability.
I'll try to answer specific questions should you have them (many
converters write to me with questions). You're welcome to come to Miami
to see the van and to take measurements yourself.
Good luck,
Glenn Terry,
bettermiami1@yahoo.com
4-13-15 BED DIMENSIONS
Today I went our to visit our camper in the driveway with camera, note pad, and measuring tape in hand.
A new friend, Hugh Andrews, wrote to ask, "I just bought an '05 Sienna and am ready to convert it. Could you measure the bed top for me?".
I did this, described the building process (with photos) and sent them along to Hugh. Now you can see them too.
Glenn,
The Grove Guy
( I live in Coconut Grove)
To: Hugh Andrews
Hello Hugh.
Congratulations on your purchase. You're going to have great adventures in your converted van. Looking elsewhere on the Grove Guy blog, you can see that since 1911, we've taken our van all over the place.
Here are some suggestions and the measurements you asked for to help you build the top of the bed.
Use good quality plywood, just thick enough (I used 5/8") to keep it strong but light. One 4"x8' piece of plywood will do. I had the lumber yard cut it as their saws make these long cuts clean and easy (and are well worth paying the cutting fee).
Again, I made my bed as long as I am tall, 6'1". Our bed is 45" wide. Note: In May, 2018, I built a second bed that is 50" wide. That's as wide as you can go with a 2011=2018 Sienna. My wife wanted more room.
First, the 5/8" plywood is cut length-ways to make it 45" wide.
Then you make horizontal cuts of 30", 5", 17", and 21".
Here's how they break down. Imagine you are looking into the van from the back. You've already built the bed frame from 2x2 pine.
Below you see the inside of the bed from the back with the four pieces of plywood marked. In this position Piece #3 is ready to fold up to put the seat back in position.
 Here is the same thing seen from the front right side. (yes, it is blurry but what the heck. That's piece #4 on the bottom with piece #3 on top of it, ready to fold up on its hinges to create the seat back.
 1) As you look into the van from the back, just in front of you is the foot (bottom) of the bed. this is where the 30"x45" piece goes. It will be fastened by two hinges to piece #2 and it will be the door that you lift up (see photo to the left) to reveal the "basement" storage area.
2) The second piece, the 5" strip, is glued and screwed to the frame above piece #1. This adds strength to the bed frame and it makes it more rigid. It is the only
piece of the bed top that does not move. Detail of right side corner where #1 and #2 attach in flat bed configuration. #2 does not attach to #3 as #3 has to be free to "swing up" to form the seat back.
3) The third piece, 17"x45" plywood, will be the back of the seat that the bed converts to. It has a piece of 2x2 attached to the bottom (where it meets #2) to give it strength and allow a good place to attach the struts that hold it up in the seat position. It is attached to #4 with three hinges (you can see them here).
4) The fourth piece is 21"x45" and it is the "head of the bed" and bottom of the seat. It moves forward when converting the seat into a bed. It has Two 2x2 on the bottom to add strength to the plywood and to prevent it from sliding forward when in seating position. The "south'' one goes next to the hinges.
You add these four length numbers and they come up to 73". Amazing, 6'1", just like I had planned.
 Here is what the top of the bed looks like, from the front right side, when all of the piece lie flat for the bed configuration. #3 & #4 are attached by three hinges. The middle one is a brass piano hinge (but most any thin hinges will do).
That's about it.
Here is what the top of the bed looks like, from the front right side, when all of the piece lie flat for the bed configuration. #3 & #4 are attached by three hinges. The middle one is a brass piano hinge (but most any thin hinges will do).
That's about it.
 Good luck on your project. Glenn
I added this photo for its entertainment value. I got hit in the head by a falling papaya last week. Hopefully, it will knock some sense into me.
May 5, 2015
Hugh Andrews just finished his camper and is on his first mini-camper adventure (New River Gorge, WV) How exciting.
He built his so he can easily put the seats back in when camping season ends. The bed is wider than ours (my wife loves this. "I'd like that room to stretch out", says she. What a craftsman, that Hugh. Check out the pictures he sent along:
 He built the frame in his garage. Below is the finished product.The "side table" probably bolts to the frame above. The right side of it holds the front left side of the bed.
Lots of room here to stretch out
He built the frame in his garage. Below is the finished product.The "side table" probably bolts to the frame above. The right side of it holds the front left side of the bed.
Lots of room here to stretch out
 This is Hugh's "strut set" (with custom pockets to store them), the arms that hold the bench back upright. I chose to attach mine permanently to the bed frame (they fold down when not in use).
And now for a little levity in the tedious world of van conversion. My old friends and I experienced our high school's 50-year reunion last weekend. It ended with a Sunday softball game in which my buddy, Terry, caught a line drive in the face. He swears it isn't as bad as it looks but, as you can see, I have my doubts.
And now, back to serious business,
Good work Hugh, and thanks for sharing your project with us.
______
6-8-15
Mr. Andrews is raising the coolness level of his van to new heights. In the photo you can see his new tent extension that mounts over the raised back door ( a DAC Explorer 2, about $140) and and ARB 2500 awning (around $300). He also considered a Tail Vail (trailvail.com) which is a similar rear tent that extends to the ground.
These should keep the sun and bugs out....and speaking of bugs,
TERMITE ATTACK
We were recently surprised to see evidence of termites feasting on our van's interior woodwork.
 These piles of poop (and the bugs that were making them) had to go. We tried spraying termite poison in their tiny entrances and we gassed the van with a bug bomb.
We think these didn't kill the eggs because they were back in weeks.
Extreme temperatures kill these critters too. It never snows in Miami but it sure gets hot. We learned that termites die when the temperature gets to 140 degrees for an hour. So, here's shat we did...
These piles of poop (and the bugs that were making them) had to go. We tried spraying termite poison in their tiny entrances and we gassed the van with a bug bomb.
We think these didn't kill the eggs because they were back in weeks.
Extreme temperatures kill these critters too. It never snows in Miami but it sure gets hot. We learned that termites die when the temperature gets to 140 degrees for an hour. So, here's shat we did...
 We put a meat thermometer in the window and a heater (and a big thermometer) on the floor. We parked the van in the Miami mid-day summer sun.
The sun alone can take it up to 115 degrees inside.
It took two hours for the van's interior to reach 140. An hour later we unplugged the heater and let our sweltering camper cool down.
When opened her up there were about 40 winged termites dead on the floor. We could not detect any heat damage to our van.
We swept up the bugs and dumped them in our pond. The gold fish love baked termites!
_______________
 Lobster tails on the grill. Camping on the ocean in the Florida Keys
_______________
Lobster tails on the grill. Camping on the ocean in the Florida Keys
_______________
6-12-15 Unless we add pontoons our van will spend most of the summer in the driveway. We're off to France.
A friend sent me a video of someone who has converted a Sprint work van into something like a lush yoga temple,
http://tinyhousefor.us/rvs-trailers/incredible-diy-motorhome/
We kept our project simple and let the wilderness surrounding our van be our "temple".
_____________________
8/14/15
We spent this summer exploring three European countries. We counted the (mostly uncomfortable) beds we slept in (twelve). We concluded is that one of the coolest things about traveling in a van is that you have the same bed to come home to every night.
If you want come on this adventure join up at www.thegroveguy.blogspot.com.
 In van building news, Mark of Alaska sent me photos of a very simple van conversion project. It's a box with a front flap that rests on the folded middle seats. A friend of his built this for $70. It doesn't have a couch that converts to a bed or much storage.
It does allow you to switch back to passenger mode easily.
_______________
8-15-15
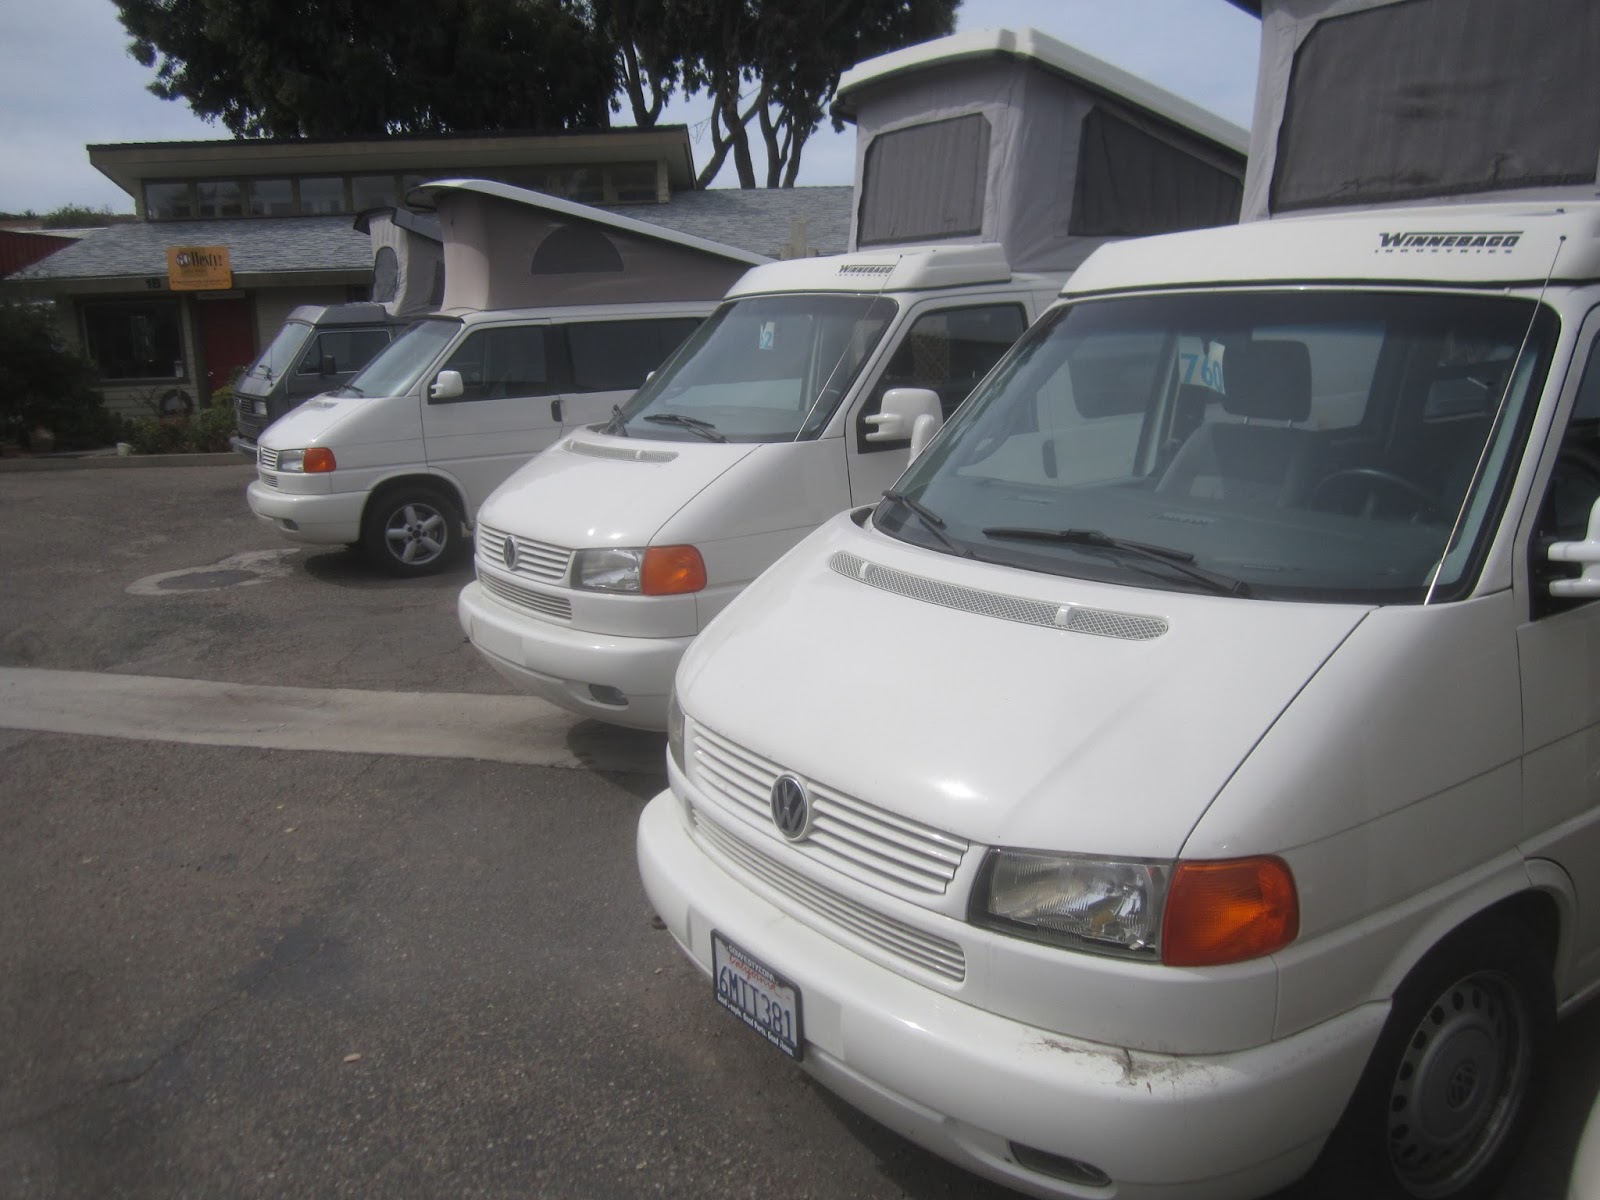
 Last week my wife and I visited one of the sacred places for all who love, or have loved ( and probably suffered with), Volkswagen campers.
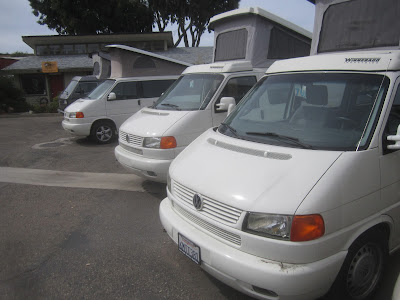 "GoWesty" is a thriving business on the central California coast (Los Ossos) that takes 86' to 03' VW vans and makes them like new. Their mechanics go from bumper to bumper replacing every worn part. They're not cheap. Prices range from $30,000 to $70,000.
Note: "Westy" is the affectionate name for VW Westfalia camper vans.
Their vans are for those who have dreamed of owning a VW camper and who can afford the best. That's not me but,
"GoWesty" is a thriving business on the central California coast (Los Ossos) that takes 86' to 03' VW vans and makes them like new. Their mechanics go from bumper to bumper replacing every worn part. They're not cheap. Prices range from $30,000 to $70,000.
Note: "Westy" is the affectionate name for VW Westfalia camper vans.
Their vans are for those who have dreamed of owning a VW camper and who can afford the best. That's not me but,
 check 'em out at www.gowesty.com .
We used to own (and often repair) one like this, an '87 VW Westfalia camper.
In Europe, California, and Hawaii you can rent them.
My brother-in-law and his family are now living in one for a week as they explore Yosemite National Park.
_________________________________
check 'em out at www.gowesty.com .
We used to own (and often repair) one like this, an '87 VW Westfalia camper.
In Europe, California, and Hawaii you can rent them.
My brother-in-law and his family are now living in one for a week as they explore Yosemite National Park.
_________________________________
9-30-15
I had to laugh at this cartoon in last Sunday's paper. It captured the troubles we had with our '87 VW camper.
Now in the fall of '15 our Sienna camper is running great, begging for the next adventure.
OFF TO THE FLORIDA KEYS (10-12-15)
Our van spent months in the South Florida heat this summer (we were looking for cool weather in Europe). We dusted it off last weekend and headed for a spot in the Keys.
You can camp just ten feet from the Great Atlantic and Havana is just over the horizon.
More on my 10-12-15 blog, "30 Feet of Beachfront, $40".
*******
Nov. 3, 2015
This just in from a new friend, "Jim". I'm not sure just what he did with all the drawers sliding here and there but he seems very happy with the results.
Brilliant design! I copied it for my 2007 Sienna. I used an single IKEA
pine bed for the base turning the headboard upside down.
I used a 2'
drawer slide to slide in for the seat and out for the bed. I used 3/4
ply for the bed hinged like yours. I made the seat back low enough to
see out the back windows.
With only a few inches left, I hacked an
IKEA small 3 drawer one foot wide x 3 foot chest in to a sink with a large
stainless steel bowl, a grey water tank and two small drawers. This is
mounted on flat mounted drawer slides I can slide forward with the front
passenger seat. there is a folding shelf that folds out the side door
for cooking if there is no table.
For privacy I made refletex window covers
with black fabric sewed and glued to one side. These have grommets which
hold clear plastic suction cups that attach to the glass.
Your design is
the best I've seen for a minivan. I'm so inspired! on MINIVAN CONVERSION
(Thanks Jim. Your enthusiasm is contagious!) G
JUNE, 2016
FIVE YEARS LATER WE'RE
HEADING WEST AGAIN!
Here we go, getting ready for another 11,000 mile trip from Miami to Berkeley with many, many stops along the way.
The van's been thoroughly checked out. She's got new tires and a bigger awning. We "spread her wing" today for the first time.
This one is bigger and white (to reflect the sun better). Stay tuned to www.thegroveguy.blogspot.com for more stories from the road!
___________________
July 29, 2016
SECOND CROSSING
 Many people look at this blog to see how we have converted our van into a camper. That's great but what you are reading is just one of 500+ entries in my "The Grove Guy" blog.
If you want to see where we are traveling this summer just go to www.thegroveguy.blogspot.com .
We are now 5000 miles into another cross-country tour of the USA. Except for replacing one set of wheel bearings ($300, Lexington, Va.) our van has been behaving perfectly.
A camper van can take you to many fantastic places (like Rocky Mountain National Park) This is my wife, Francesca, watching a distant moose!
Many people look at this blog to see how we have converted our van into a camper. That's great but what you are reading is just one of 500+ entries in my "The Grove Guy" blog.
If you want to see where we are traveling this summer just go to www.thegroveguy.blogspot.com .
We are now 5000 miles into another cross-country tour of the USA. Except for replacing one set of wheel bearings ($300, Lexington, Va.) our van has been behaving perfectly.
A camper van can take you to many fantastic places (like Rocky Mountain National Park) This is my wife, Francesca, watching a distant moose!
 We met another couple (Larry and Melanie) in Canyonlands NP last week. They had converted their 2001 Sienna as well. Incredibly, it has 281,000 miles on it and they say they've had no serious problems.
This happy couple retired early. They spend the summers van- camping and their winters on a 46' sailboat in Mexico. Above, Larry giving the thumbs up for his Sienna
I'll tell you about their conversion later. It is more simple than mine.
Wishing happy trails to you this summer,
Glenn & Francesca
www.bettermiami1@yahoo.com
8-2-16, Headline seen this morning:
VANDWELLING IS THE NEW AMERICA DREAM
Maybe we're on to something. Below is a link to an article about folks who live in their vans all the time.
It's not our American dream but the folks described are living in rolling homes are a lot like our camper van,
http://www.vice.com/read/living-out-of-your-car-is-the-new-american-dream
________________
9-16-16 Hello van fans. We've been on the road for three months now. Two weeks ago I went to my first Burning Man (the 8-day festival in Nevada's desert)
We met another couple (Larry and Melanie) in Canyonlands NP last week. They had converted their 2001 Sienna as well. Incredibly, it has 281,000 miles on it and they say they've had no serious problems.
This happy couple retired early. They spend the summers van- camping and their winters on a 46' sailboat in Mexico. Above, Larry giving the thumbs up for his Sienna
I'll tell you about their conversion later. It is more simple than mine.
Wishing happy trails to you this summer,
Glenn & Francesca
www.bettermiami1@yahoo.com
8-2-16, Headline seen this morning:
VANDWELLING IS THE NEW AMERICA DREAM
Maybe we're on to something. Below is a link to an article about folks who live in their vans all the time.
It's not our American dream but the folks described are living in rolling homes are a lot like our camper van,
http://www.vice.com/read/living-out-of-your-car-is-the-new-american-dream
________________
9-16-16 Hello van fans. We've been on the road for three months now. Two weeks ago I went to my first Burning Man (the 8-day festival in Nevada's desert)
and after that, the van was thrilled to be visiting Yosemite NP again.  We're in Hurricane, Utah, at the moment, about to plunge into the wonders of Zion National Park. I'm happy to report that our Toyota camper ("The Amber Rambler") is carrying us everywhere with a smile and no problems. We'll be back in Florida in two weeks.
HOME AGAIN- We made it back to South Florida without any problems. The American southwest is fantastic as ever. If you want to see details they're on the blog in the August/Sept. 2016 section.
______________________________________________
NEW FRIENDS FROM CANADA Dec. '16
Isabelle and Hubert drove down from Quebec in November to
spend a month in Florida. Here are some photos of their Dodge Caravan conversion,
Didn't they do a great job? Isabelle reports that, since South Florida campgrounds are so crowded and expensive, they're often finding refuge in Cracker Barrel restaurant parking lots. Apparently, the CB folks are okay with overnight camping.
Our Quebec friends are now passing through the American southwest on their 6-month tour. We wish Isabelle and Hubert all the best.
_____________________________________
We're in Hurricane, Utah, at the moment, about to plunge into the wonders of Zion National Park. I'm happy to report that our Toyota camper ("The Amber Rambler") is carrying us everywhere with a smile and no problems. We'll be back in Florida in two weeks.
HOME AGAIN- We made it back to South Florida without any problems. The American southwest is fantastic as ever. If you want to see details they're on the blog in the August/Sept. 2016 section.
______________________________________________
NEW FRIENDS FROM CANADA Dec. '16
Isabelle and Hubert drove down from Quebec in November to
spend a month in Florida. Here are some photos of their Dodge Caravan conversion,
Didn't they do a great job? Isabelle reports that, since South Florida campgrounds are so crowded and expensive, they're often finding refuge in Cracker Barrel restaurant parking lots. Apparently, the CB folks are okay with overnight camping.
Our Quebec friends are now passing through the American southwest on their 6-month tour. We wish Isabelle and Hubert all the best.
_____________________________________
THE PLYWOOD BED DIMENSIONS
May 1, '17
Joe Timm wrote asking me about the dimensions of each piece of the 1/2" p-wood bed. I covered them earlier in the blog but here they are again:
The
" basement" piece of 1/2" plywood (at the rear) is 30" deep, the next (the one that is
permanent) is 5", then 17" (back of "couch") then 21" for the couch
seat. When they are flat and next to each other (in bed configuration) they add up to 73" (6'1", my height).
All
are 45"wide. They (and the bed) can be 50" wide in a Sienna. Wider
means a little less shelf space. We chose 45" as it was the width of our old VW camper bed. I will make the bed wider the next time. I will make my wife very happy.
Glenn
_______________________________________________
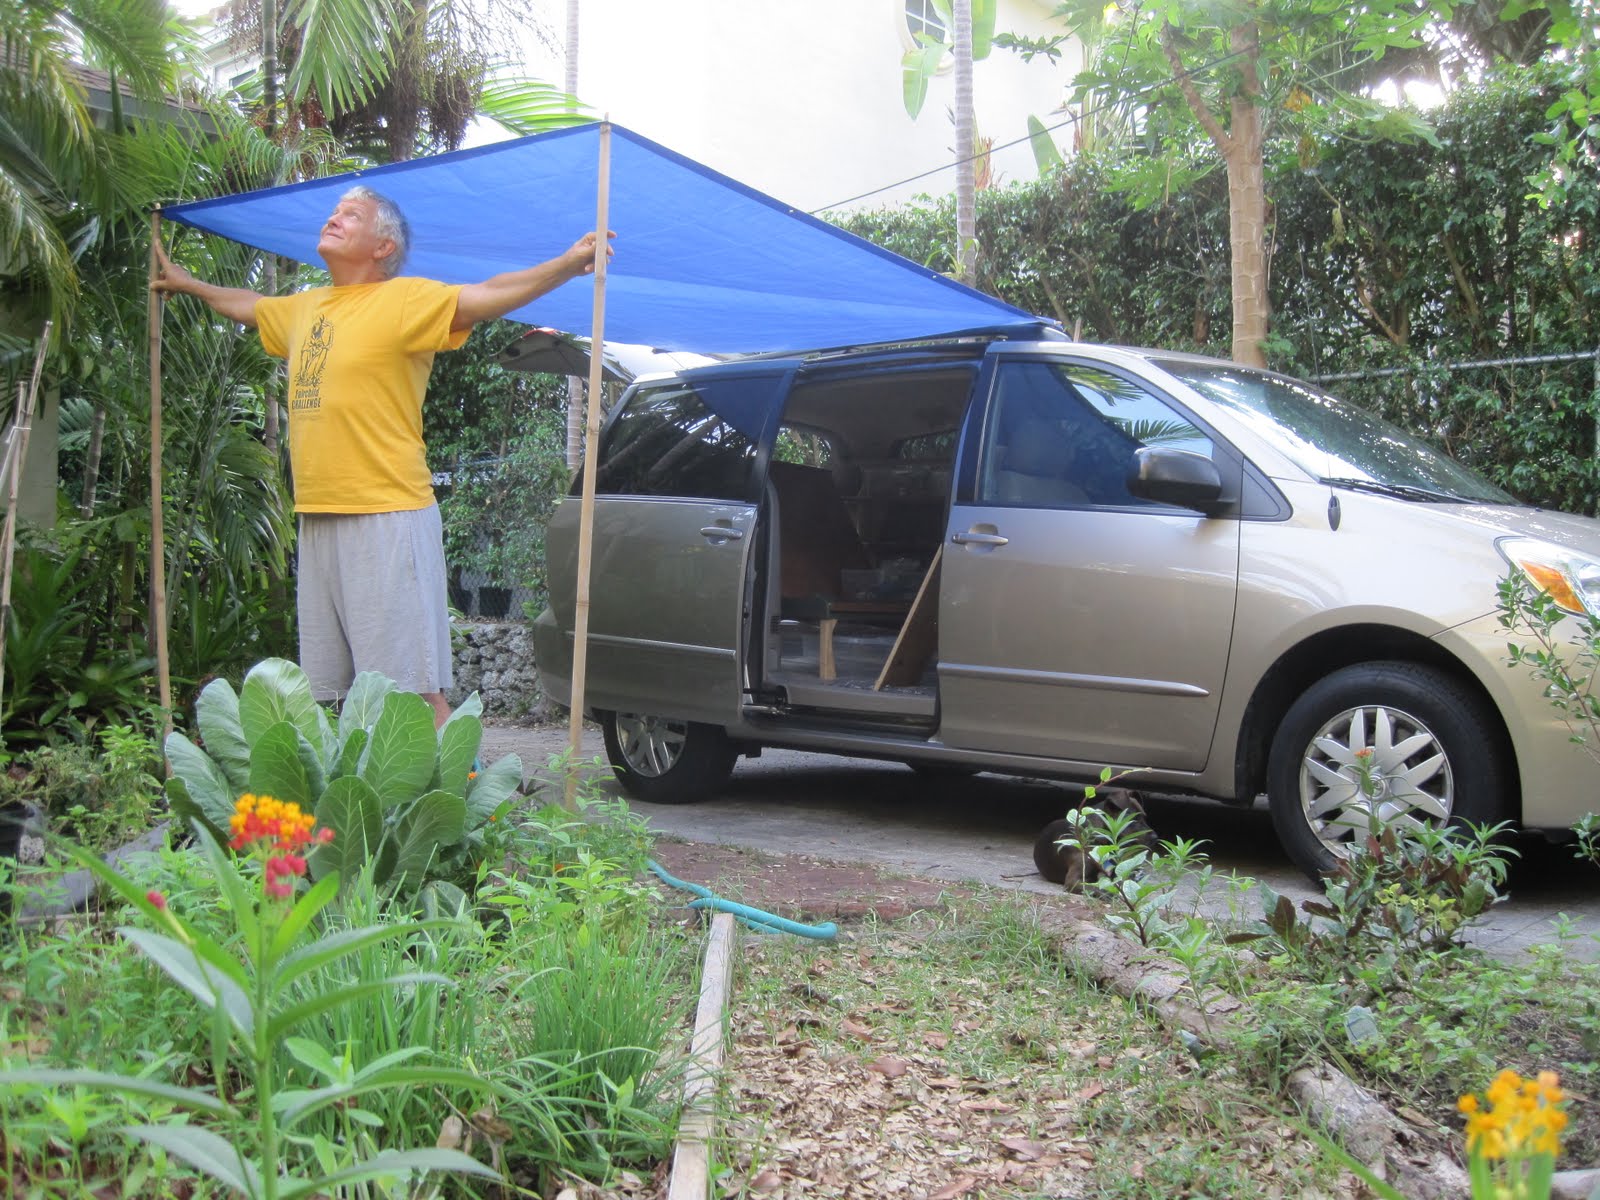
ATTACHING A TARP TO THE OUTSIDE
May 1, '17
Lisa has asked questions about the tarp we attach to the van to protect us from the sun and rain. The little blue (6'x8') one you see at the blog's beginning was okay but a little small. We now carry
two, one for rain and the other (larger for shade). Here's my response:
Hi Lisa,
Good questions, welcome to the van life. I attach the shade tarp to
the van roof rack by attaching a pole to the rack in a "permanent" way with rope. On end of the pole are small rope loops (attached to the pole through holes that I drilled). I attach the tarp to the loops with small pieces of rope. Another way is to tie one end with rope (or use and "S" hook) and
the other end with a small bungee cord. You can put a rope tie in the middle of the tarp as well using a middle
grommet hole.
 The easiest poles to obtain are 2x2 pine (actually 1 1/2" sq. on end). Round 1 1/2" wood poles (curtain rod mat'l) look
nicer. I like bamboo because it's everywhere in South Florida and it looks cool. Metal or fiberglass poles
are an option too.
If you live in a forest, go find (and cut) the natural wood poles!
My rack pole was bamboo but it is now a fiberglass extension pole used to clean pools or trim trees. People here throw them out all the time so mine was free. Since it changes length (from 8' to 14') I can use different size tarps. I glued pieces of broom sticks

 into each end (with tough epoxy) to make the ends stronger.
We use a smaller, blue one for rain (8x10, I think) and a large white one for serious shade ( 10' x 12').
Let's discuss the "outside corner poles" now. Ours are 1" bamboo with 1/4" wooden pegs glued into the ends to go
 through
the grommet holes. There are two poles, one at each corner. Mine are 6'6" tall. The
poles are a little shorter that the roof rack pole's height
through
the grommet holes. There are two poles, one at each corner. Mine are 6'6" tall. The
poles are a little shorter that the roof rack pole's height
(mounted on the van) so there will be enough slope allowing the rain to
drain off. We carry a third pole too as sometimes it is
needed to support the middle to drain off heavy rain. These poles are tied to roof rack when not in use with rope or straps.
You'd think rain would come down the side of the van but on our Sienna, it does not. The roof is designed to channel it off the ends of the roof. I suppose this means the outer poles could be taller than the roof rack pole with the water draining on to the roof. I haven not tried that option.
We put our ground rope loops over the outer pole pegs and fasten the
other end of the ten-foot ropes to the ground using tent stakes or 1-foot nails. If you camp near trees we also consider tying onto them.
Glenn
TWO SHOTS: CAMPING IN THE FLORIDA KEYS
In the distance you can see our "shade tarp" erected at out campsite at Long Key State Park. The umbrella helps too.
Forty feet on the ocean, forty bucks a night.
_______________
SPRING CLEANING 2017
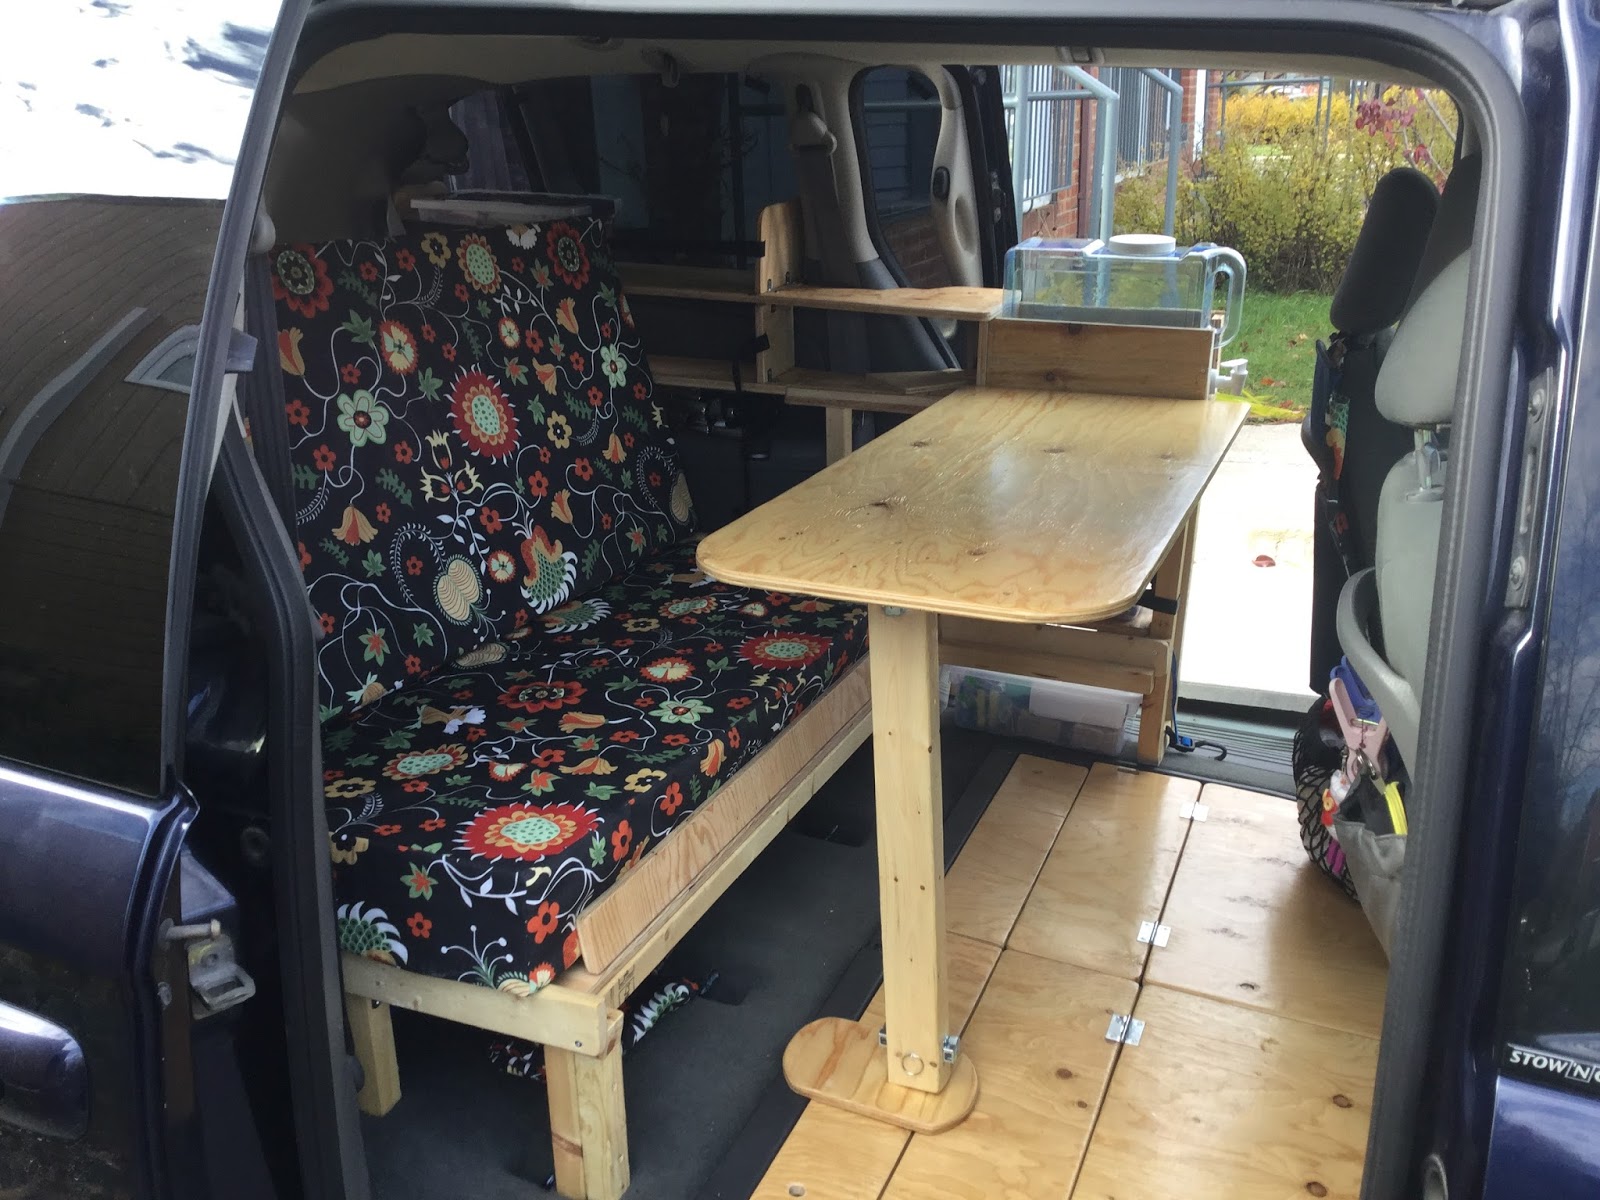
Every couple of years we take everything out. We clean, vacuum, and throw out things never used. People sometimes ask for more explanatory photos. Okay, here's what parts of the van's interior look like "bare" six years after the conversion:
It hasn't changed much. Here's how we fasten the back of the couch to the bed frame.
This is what it looks like with the "couch" portion of the bed removed. Below is what we
store below the couch. The two plastic boxes pull out like drawers when it is covered.
What we call the "basement door" (the bottom of the bed which lifts up).
I like this feature a lot, a drawer filled with kitchen
gear that pulls out both inside or outside.
_____________________________
July 29, 2017
I'm spending the summer in California. There is no shortage of cool campers here. Here's one I saw in Santa Cruz recently,
In other news,
I just got a note from Trina L. asking, "How can I put a simple toilet in my van? I don't have much room and I don't want to go the
5-gallon bucket route".
My solution is something like a bucket that folds up. I replied to her,
Hi Trina,
For starters, we rarely need a potty (there are so many public bathrooms and bushes in the world!) so we went "minimalist".
We, like many campers, have a $12 folding plastic stool. It's a great design and takes up little space.
We open it up, put a plastic bag over it, and put a toilet seat* on the top. Viola!
It's like having a bathroom that's the size of a book.
Glenn
* I made the small seat myself from plywood. Four little squares on the bottom keep it secure, set inside the four legs, on the upside down stool. It is quite small but it works.
_______________
Feb. '17
(Response to questions about the plywood bed sections)
Kyle,
I'll try to answer your questions:
When you look at the plywood bed base from the rear of the van,
you see four rectangles of plywood.
-The one closest to you is the basement lid. It is 30" deep. It
has hinges and lifts up to reveal "the basement" storage area below.
-the next one is just 5" wide. and it is permanent, giving the whole
thing stability ('cause everything else "moves") and a place to connect hinges.
-the next one hinges too (connected, like the first one, to the 5" piece). It is the seat back and it is 17" wide.
-the last one is closest to the front. This part of the van bed is the
couch seat when converted. It is 21" wide.
You last question was "How high is the bed?". The top of the bed baseis 11" from the floor.
Our bed is 45" wide. It could be wider or more narrow according to your needs. Our former VW van bed was that wide so we got use to that.
I hope this helps,
Glenn
June, 2018 NOTE: See all your question answered in detail (and photos) by going to my June, 2018 blog "Chapter Two")
________________
Hi, I just rec'd this detailed note from Elizabeth M of San Jose. They used some of my ideas and others of their own to create
the rig that was right for them.
Dear Glenn,
I want to add my thanks to you for posting all the information about your Sienna camper.
I
was inspired to remove the 3rd row seats and reveal the bug rear
"basement" storage area, but I wanted to keep the option of removing the
camping setup and using the van with the middle row seats in as a
passenger car or with no seats as a gear hauler.
I used a purchased adjustable metal bed frame and tongue-and-groove deck wood for the platform of the bed, We use a pair of Costco
self-inflating camping pads with a Costco memory foam double-bed
mattress topper to sleep on. Very comfy and well insulated (a blow-up
mattress lost too much of our body heat on cold nights!). Reflectix cut
to fit snug inside the windows (with black fabric on one side and one
side left foil-faced) gives us privacy and insulation. We also have
no-see-um netting that I put on the roll-down middle and front windows
from the outside with masking tape, so we can get bug-free cross
ventilation with the Tail Veil on warm nights.
The
space between the end of the bed and the front seats is enough to store
the cooler behind the passenger seat (allowing the passenger seat to
recline a good bit) and our Grub Hub camp kitchen (http://store.grubhubusa.com/grub-hub-camp-kitchen-mesa-1/)
on the driver's side. We love the Grub Hub! It lifts out of the van and
sets up anywhere, giving us work tables, sink, stove support, trash
bin, and hangers for a light and a water bag. We learned the hard way
that it will weather 45 mph wind gusts IF it is staked down at all the
stake-down points. We no longer use "disposable' propane bottles; we
have both 1 lb and 5 lb refillable tanks for the Colman propane stove
that fits in the Grub Hub.
We did a
great trip around southern Utah in the fall of last year, but missed
going into Escalante Staircase NM because of a three-day rainstorm. The
Smittybilt awning we thought we'd use for sun shelter was instead put to
use to give us a dry spot next to the car for the camp kitchen and two
chairs!
Again, thanks for the inspiration!
June 14, 2018
I just finished my second Sienna Conversion. It took two weeks and a good bit of woodwork. I spent $120 on materials and about the same on the cushions for the mattress and couch. See the whole, detailed process by going to my late May, '18 entry.
Here are some photos from my latest creation. It's a lot like the first one 'cept the van is newer and the bed, 5" wider.
Now we need to put in the cushions load 'er up for the next adventure. We begin a 10,000 mile cross-country trip next week. We're excited!
________________________
Sept. 10, 2018
Hey, We're still excited. We just drove our van from Miami to Canada and down to California. 8,000 miles of fun and everything worked perfectly.
 I took it to Burning Man in the Nevada desert two weeks ago and it kept the dust storms at bay.
With our bikes on the back
Banana jet at BMan
My son, Ian, waking up. The van is sheltered behind him. If you want to learn about our BMan adventures, go to www.thegroveguy.blogspot.com , Sept. 2018 .
In two weeks we'll take the long road back to Florida. I'm happy to report that everything has gone so well on this trip. Our camper van has been the perfect way to enjoy a long summer on the road.
I took it to Burning Man in the Nevada desert two weeks ago and it kept the dust storms at bay.
With our bikes on the back
Banana jet at BMan
My son, Ian, waking up. The van is sheltered behind him. If you want to learn about our BMan adventures, go to www.thegroveguy.blogspot.com , Sept. 2018 .
In two weeks we'll take the long road back to Florida. I'm happy to report that everything has gone so well on this trip. Our camper van has been the perfect way to enjoy a long summer on the road.
WORLD'S SMALLEST TOILET (January, 2022)
It'd be a sin to defecate in the Great American Desert. That's why I invented the world's smallest portable potty.
The size of a notebook, you can take anywhere that nature calls. Think of it as a bathroom you can keep in your backpack.
This project began with a common campsite accoutrement, the simple folding step stool.
Staring at mine two summers ago I realized I could turn it into a toilet, a skinny-mini porto-potti.
My wife and I were camping in SE Arizona with no one around.
Francesca took the dog for a walk
while I tried out my tiny toilet.
I was in one of the most open, beautiful places on Earth but the
darn thing could have worked in the privacy of our camper van as well.
My portable privy started out as a twelve-dollar step stool. I realized if you flipped it over and added a plastic bag it became a nifty trash can. 
Pondering further possibilities, I thought, "In a pinch I could sit on this thing and relieve myself!".
I fashioned a plywood toilet seat that fit snugly on top.
Yes, it's better suited for a six-year-old but in a pinch, in The Great American Desert, it worked for me.
Psst: It's really small but serves it purpose when needed. Most times we use the loo in campground bathrooms, or, when rolling, rest stops and fast food joints.
_______________________________
I would like to thank this project's chief photographer, Francesca, for taking on this assignment.
 This could be the world's most spectacular camping spot.
 Can you find "Goldie", our camper van?
___________________
(July, 2024 update). Summer's here one more. It's time to enjoy the van life again.
Last
fall I turned Goose over to my son, Ian. He needed
something to move him from Miami to his new home in Santa Cruz, Ca. He
gets around on bikes so he let me know when I visit him next month, "Use
Goose as much as you like". Lucky us, my wife and I are exploring fantastic northern California in our camper van again.

 told us the water was too cold for humans and dogs weren’t allowed.


 of having the most dogs married at one time.


